Prodorutti Quarter Midget Supply • Post Office Box 430 • Kulpsville, PA 19443 • (215) 362-0113 • Email Us

Enter Your Email To Get Our Newsletter:Quarter Midget:Air Filters & AdaptersBearings & Rod EndsBelt DrivesBrakes & ComponentsBumpers & Nerf BarsCar CoversDzus FastenersExhaust PipesFiberglass TailsFront Axles & Steering ComponentsFront & Rear HubsFuel Tanks, Filters & LinesGears, Hubs & ChainAnimal & Honda Engines/PartsMotor PlatesMyChron 5 & RaceceiverOils & LubricantsPit CartsRadius RodsRear Axles & ComponentsSafety EquipmentShocks & SpringsSteering WheelsTiresTire Truing & CuttingToolsWheels One PieceGo Kart Parts:This section is under construction Air Filters & AdaptersAxle Bearings, Hangers & CassetteBrakes & ComponentsChain & Chain CoversClutchesFront & Rear Wheel HubsLocking CollarsMotor MountsOil, Tire Preps & CleanersPedals & CoversRacing ApparelSprockets & HubsSteering Wheels & ComponentsTie Rods & Rod Ends |
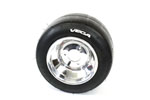
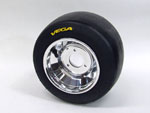
Vega TiresTire Mounting1) Remove outer protective wrapper. 2) Inspect the rim for damage such as chips, surface nicks or gouges where the bead will rest. 3) Properly hold rim so tire can be slid over rim. It helps to spray or wipe a tire lubricant on bead area to ease mounting. Lubricants can be bought at NAPA store and are called “tire mounting soap”. A Windex type product also works as a lubricant. 4) Use a tire band to control tire expansion when mounting on the rim. Using more spray will help the tire glide or pop onto the rim for proper tire seating against the rim flange. 5) Do not exceed 4 bars or 62 psi when mounting the tire to the rim. 6) Do not use heat to expand tire on rim during the mounting.
|

